My first photography exhibition: a learning process
As photographers we always look at those photography exhibitions with a mix of admiration and envy. On the one hand we think how we would love to be exhibiting our work, how it would look all lined up on the wall in a polished and posh space. Images always look different and, dare I say it, better when printed. A lot of professional or experienced photographers say that the photographic process is not complete until you print your work. I have to agree: I was one of those photographers that learned in the digital era and kept all my archive on the hard drive. No prints.
Until I printed the first image: it literally materialises the image into a palpable object you can hold and look at. You look at it, study it, turn it to the light to see it better. You don’t just press “next”, you don’t just skip over it. You treasure it. The photographic process has now come full circle, and you want to print more now. And maybe hang one or two of your best ones on the wall.
The envy is a mix of “that lucky bugger was in the right place at the right time”, “I could have shot that”, and many other self-justifying excuses to make us feel better about not being the ones exhibiting the images.
Thing is, to exhibit your work you have to have some work to exhibit. Obvious? Not really! Most of us don’t have any exhibition material.
So, why am I exhibiting? Why have I been given such opportunity? Let’s break it down.
This is not a solo show in a dedicated gallery. It is a very small display, only 9 images, in a very small exhibition space, less than 3 meters wide. It is not a dedicated space for me, but a much bigger event which I have been given the opportunity to be part of: the Out Of Order Spaces (OOOS) Open Workshops event for the 2021 London Design Festival (LDF). The LDF is spanning across different areas of the city.
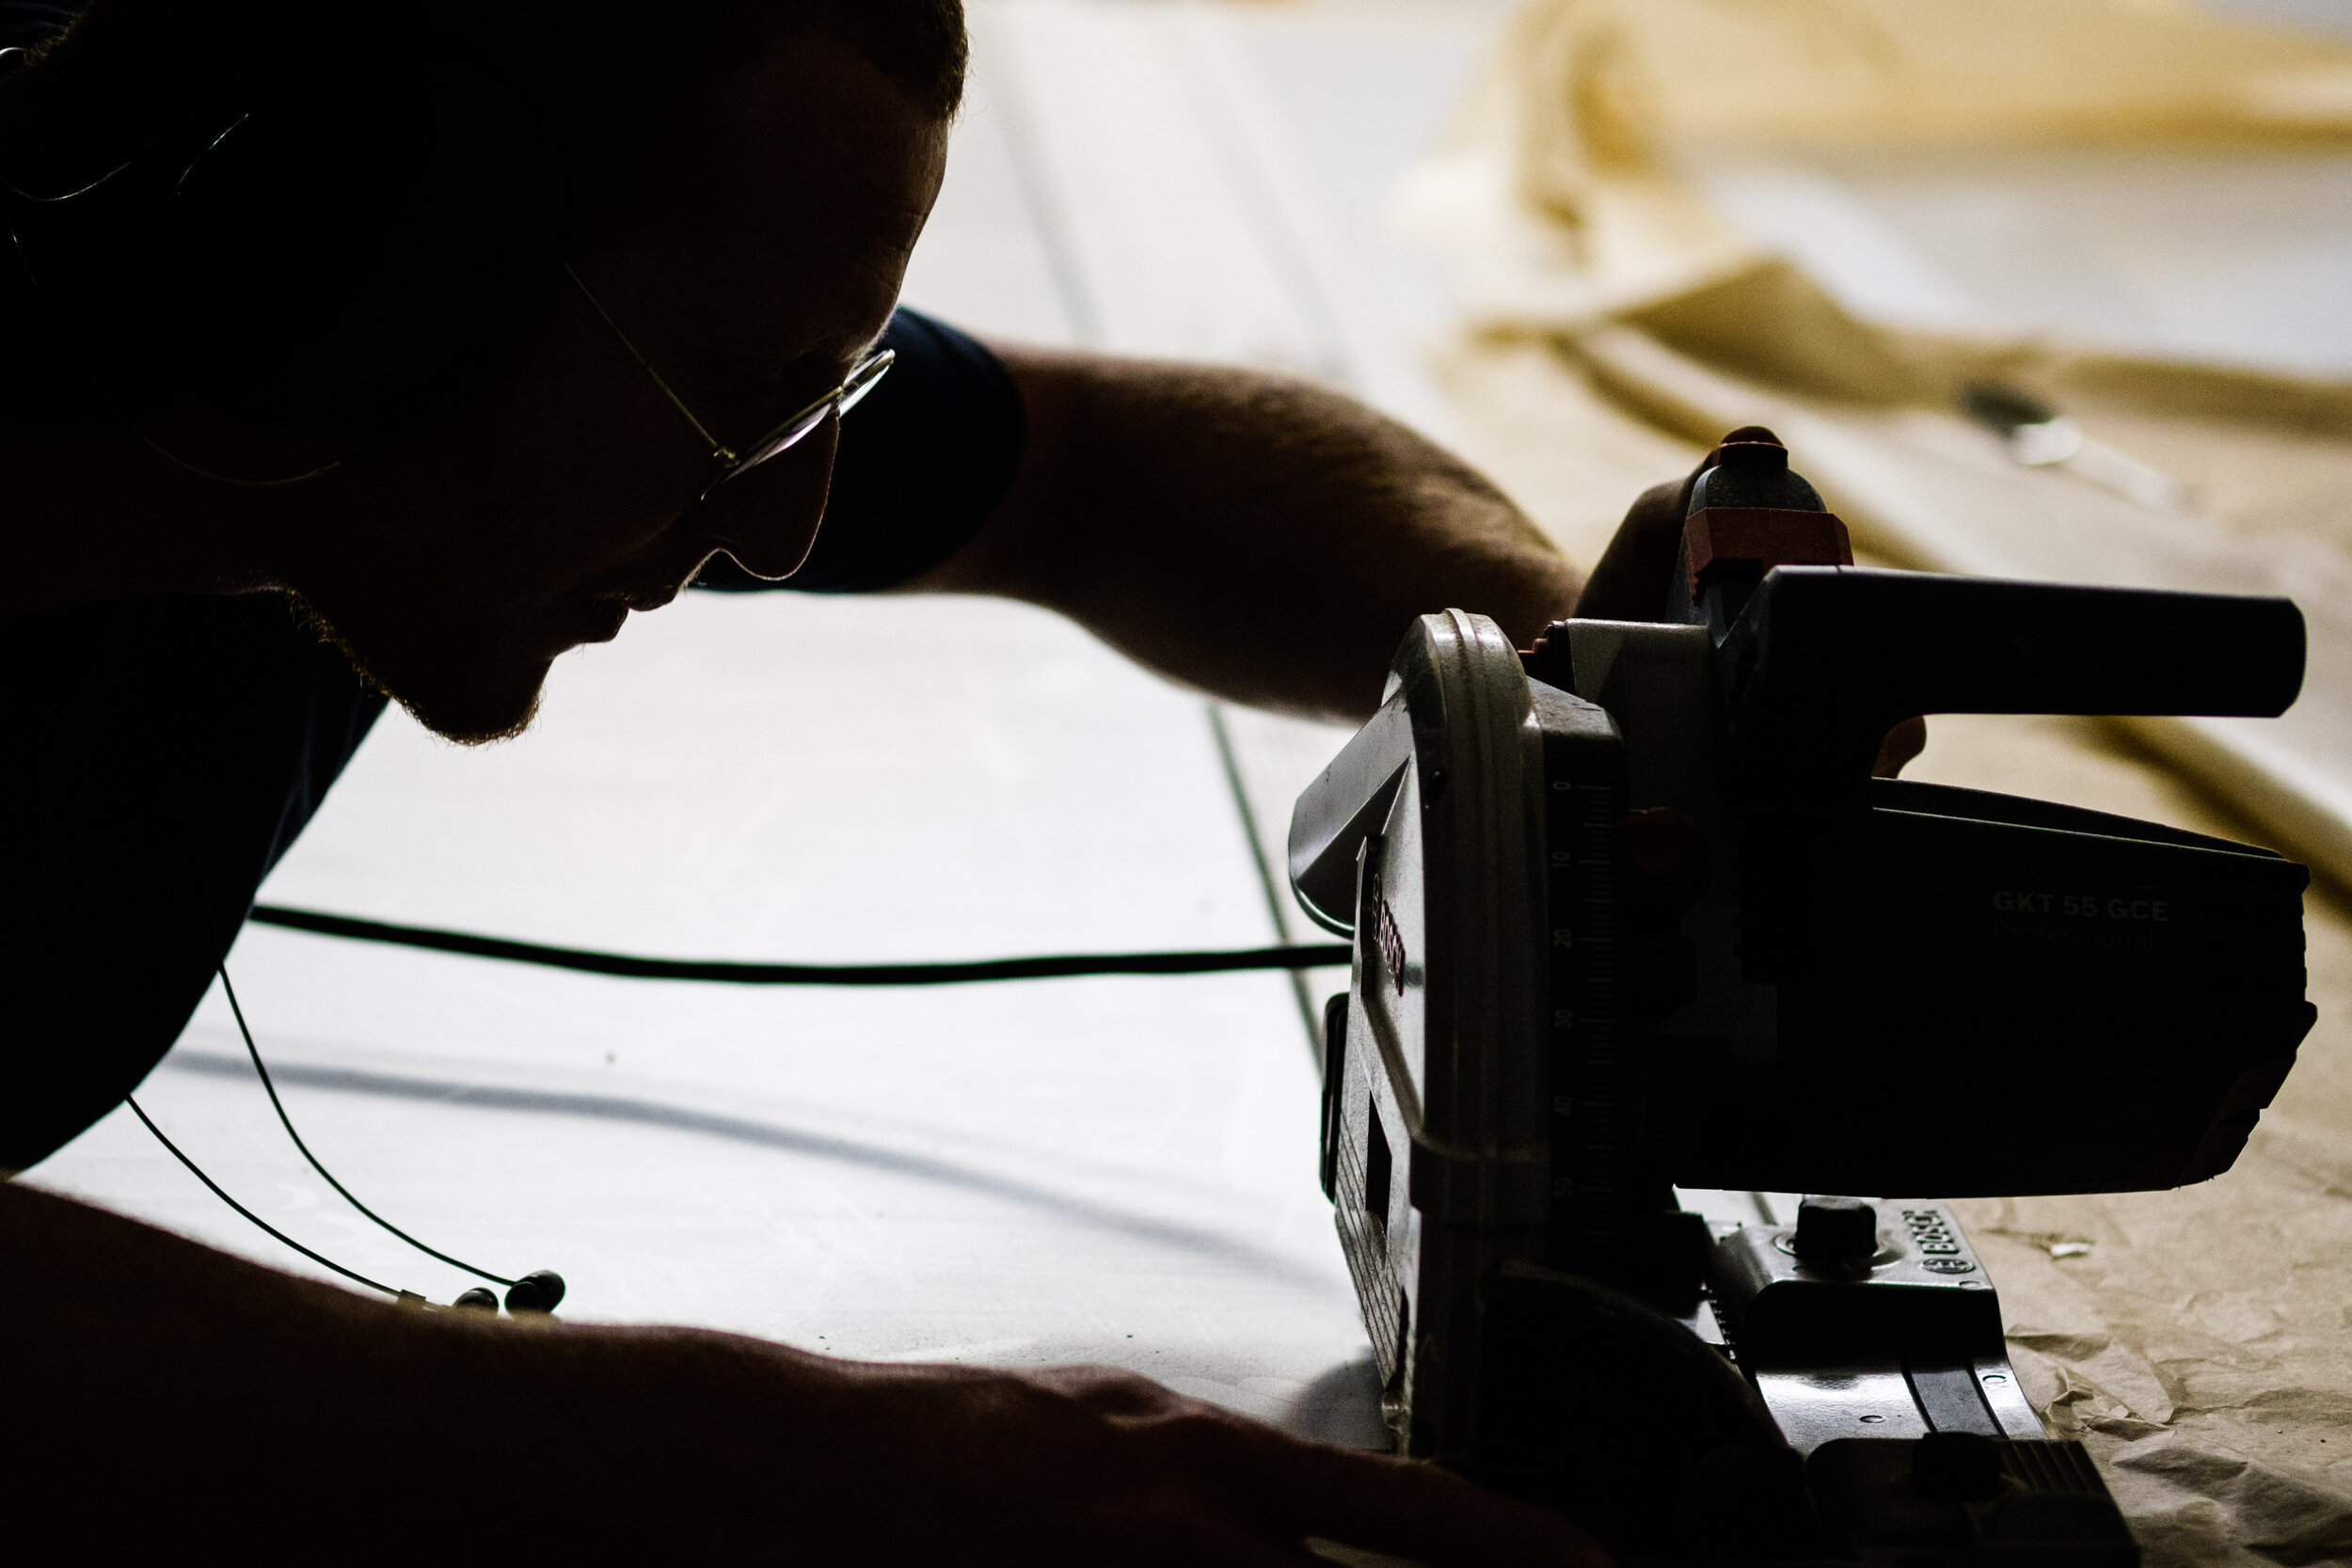
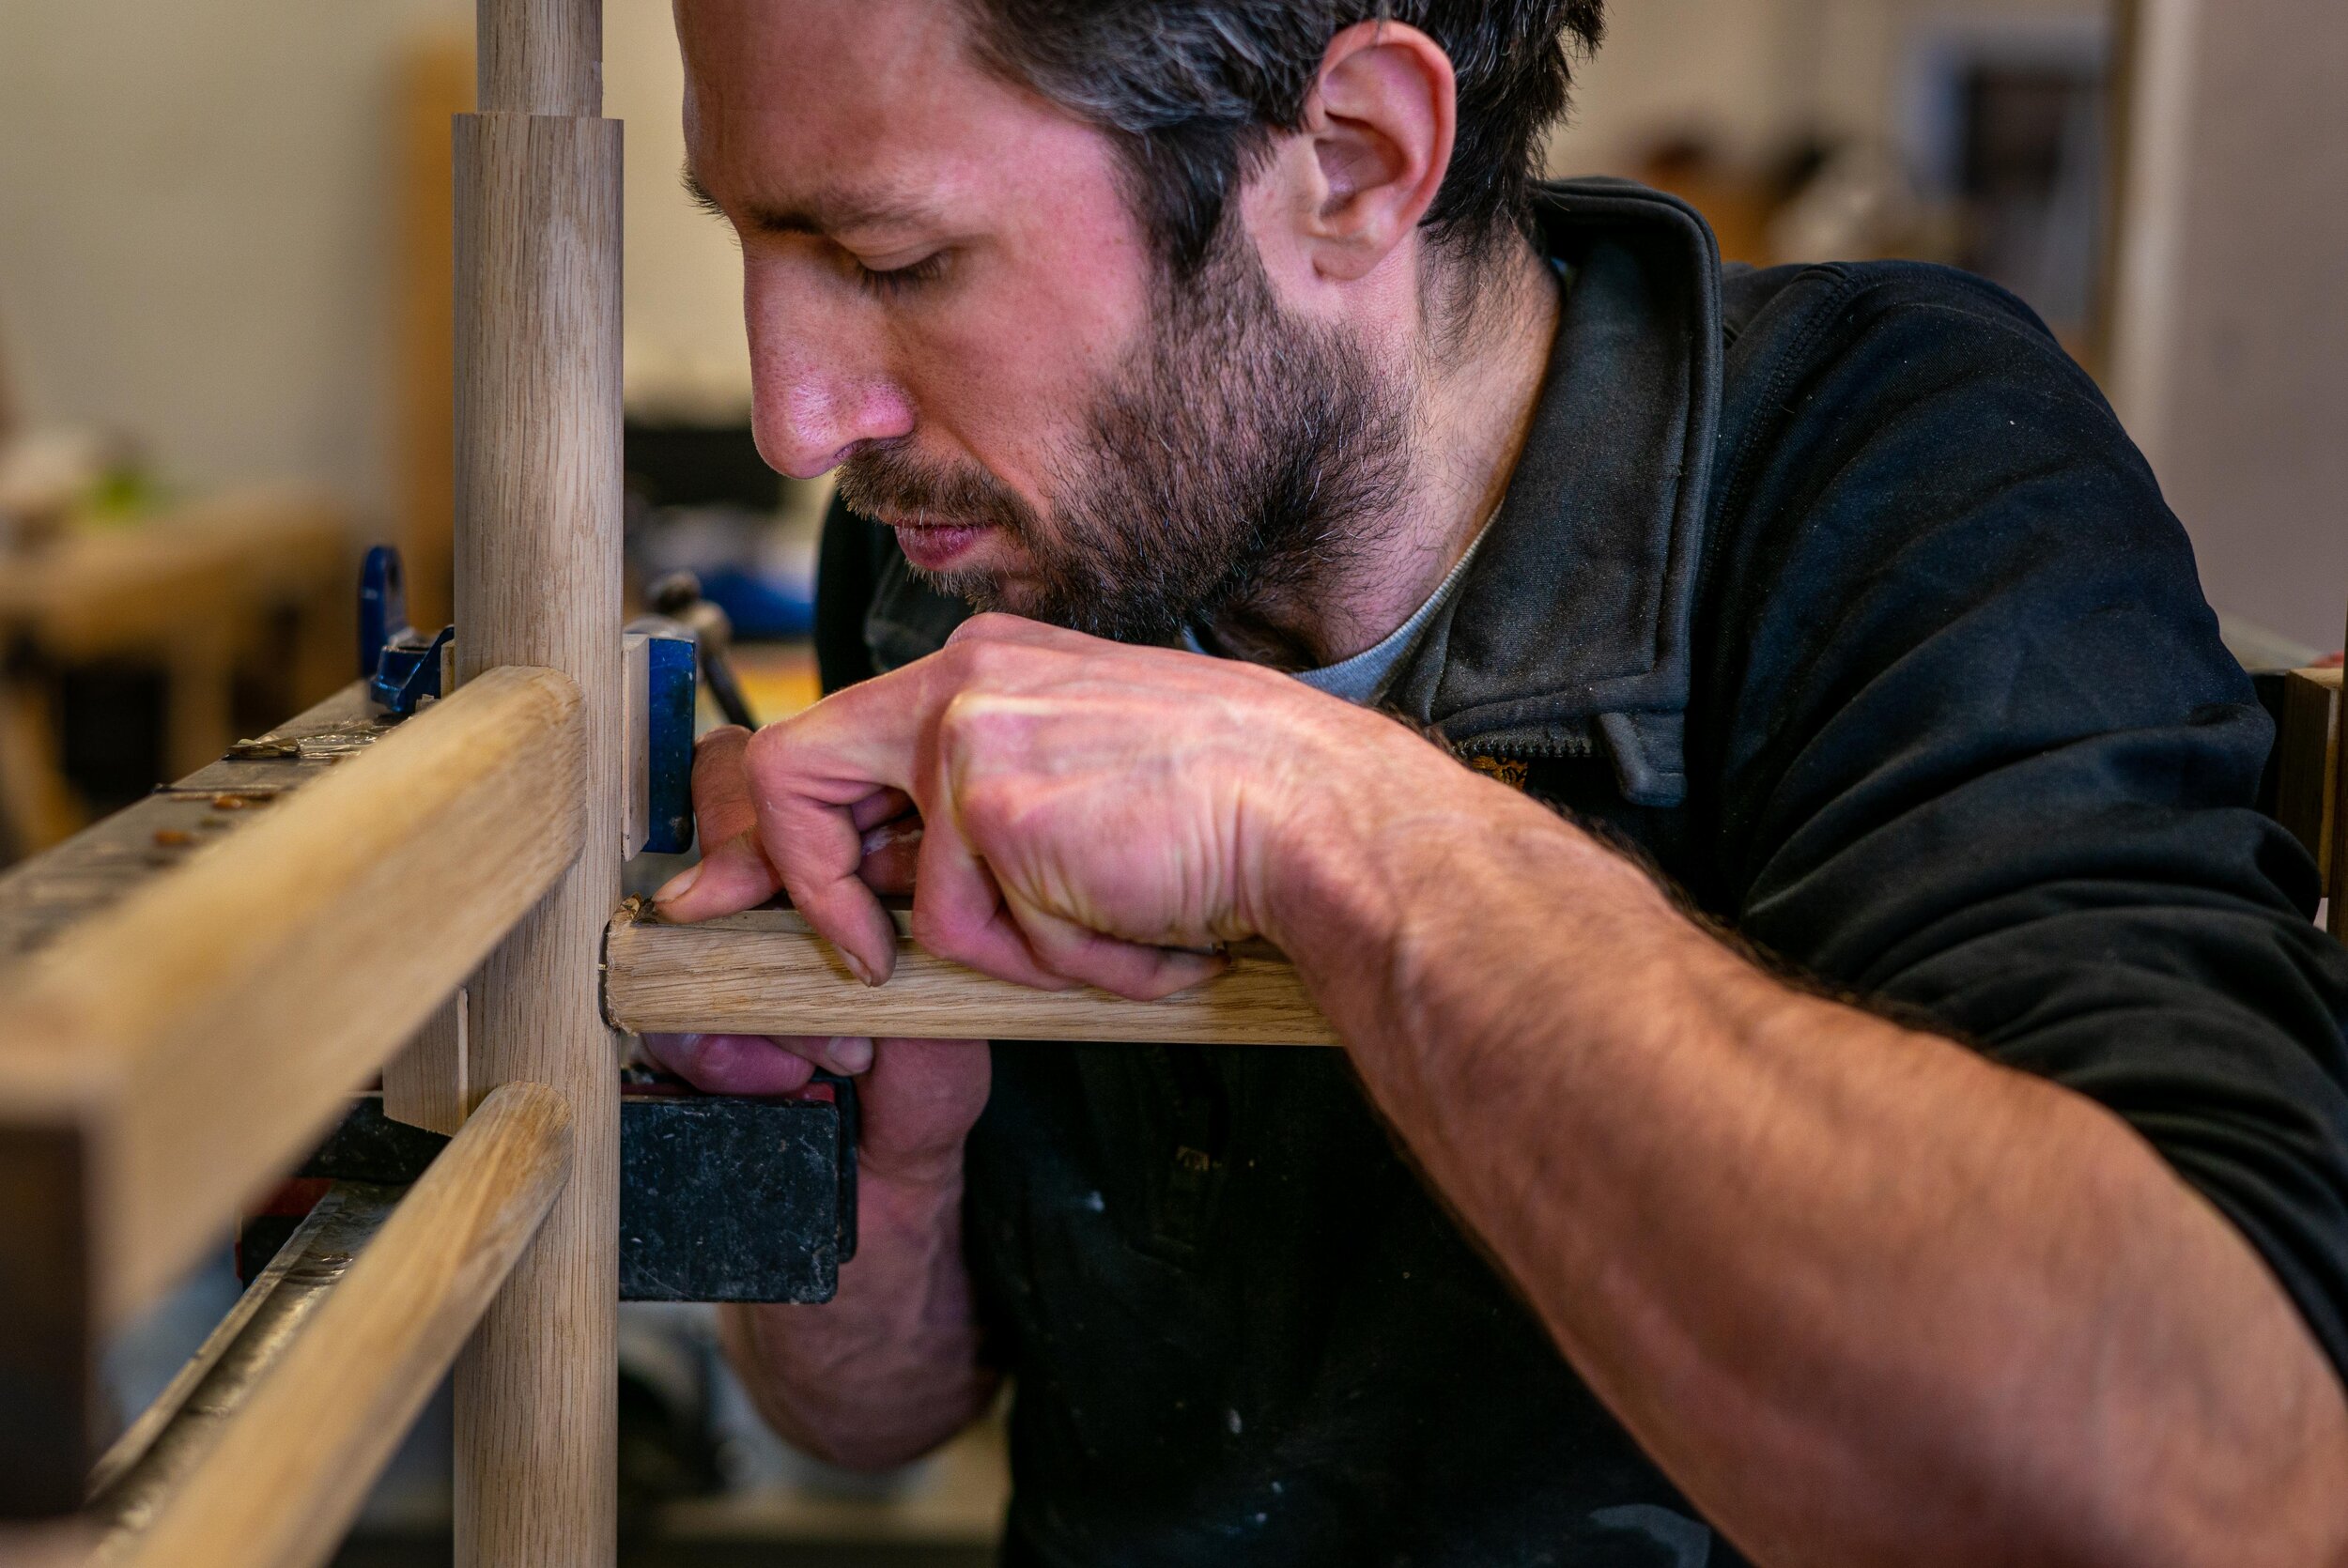
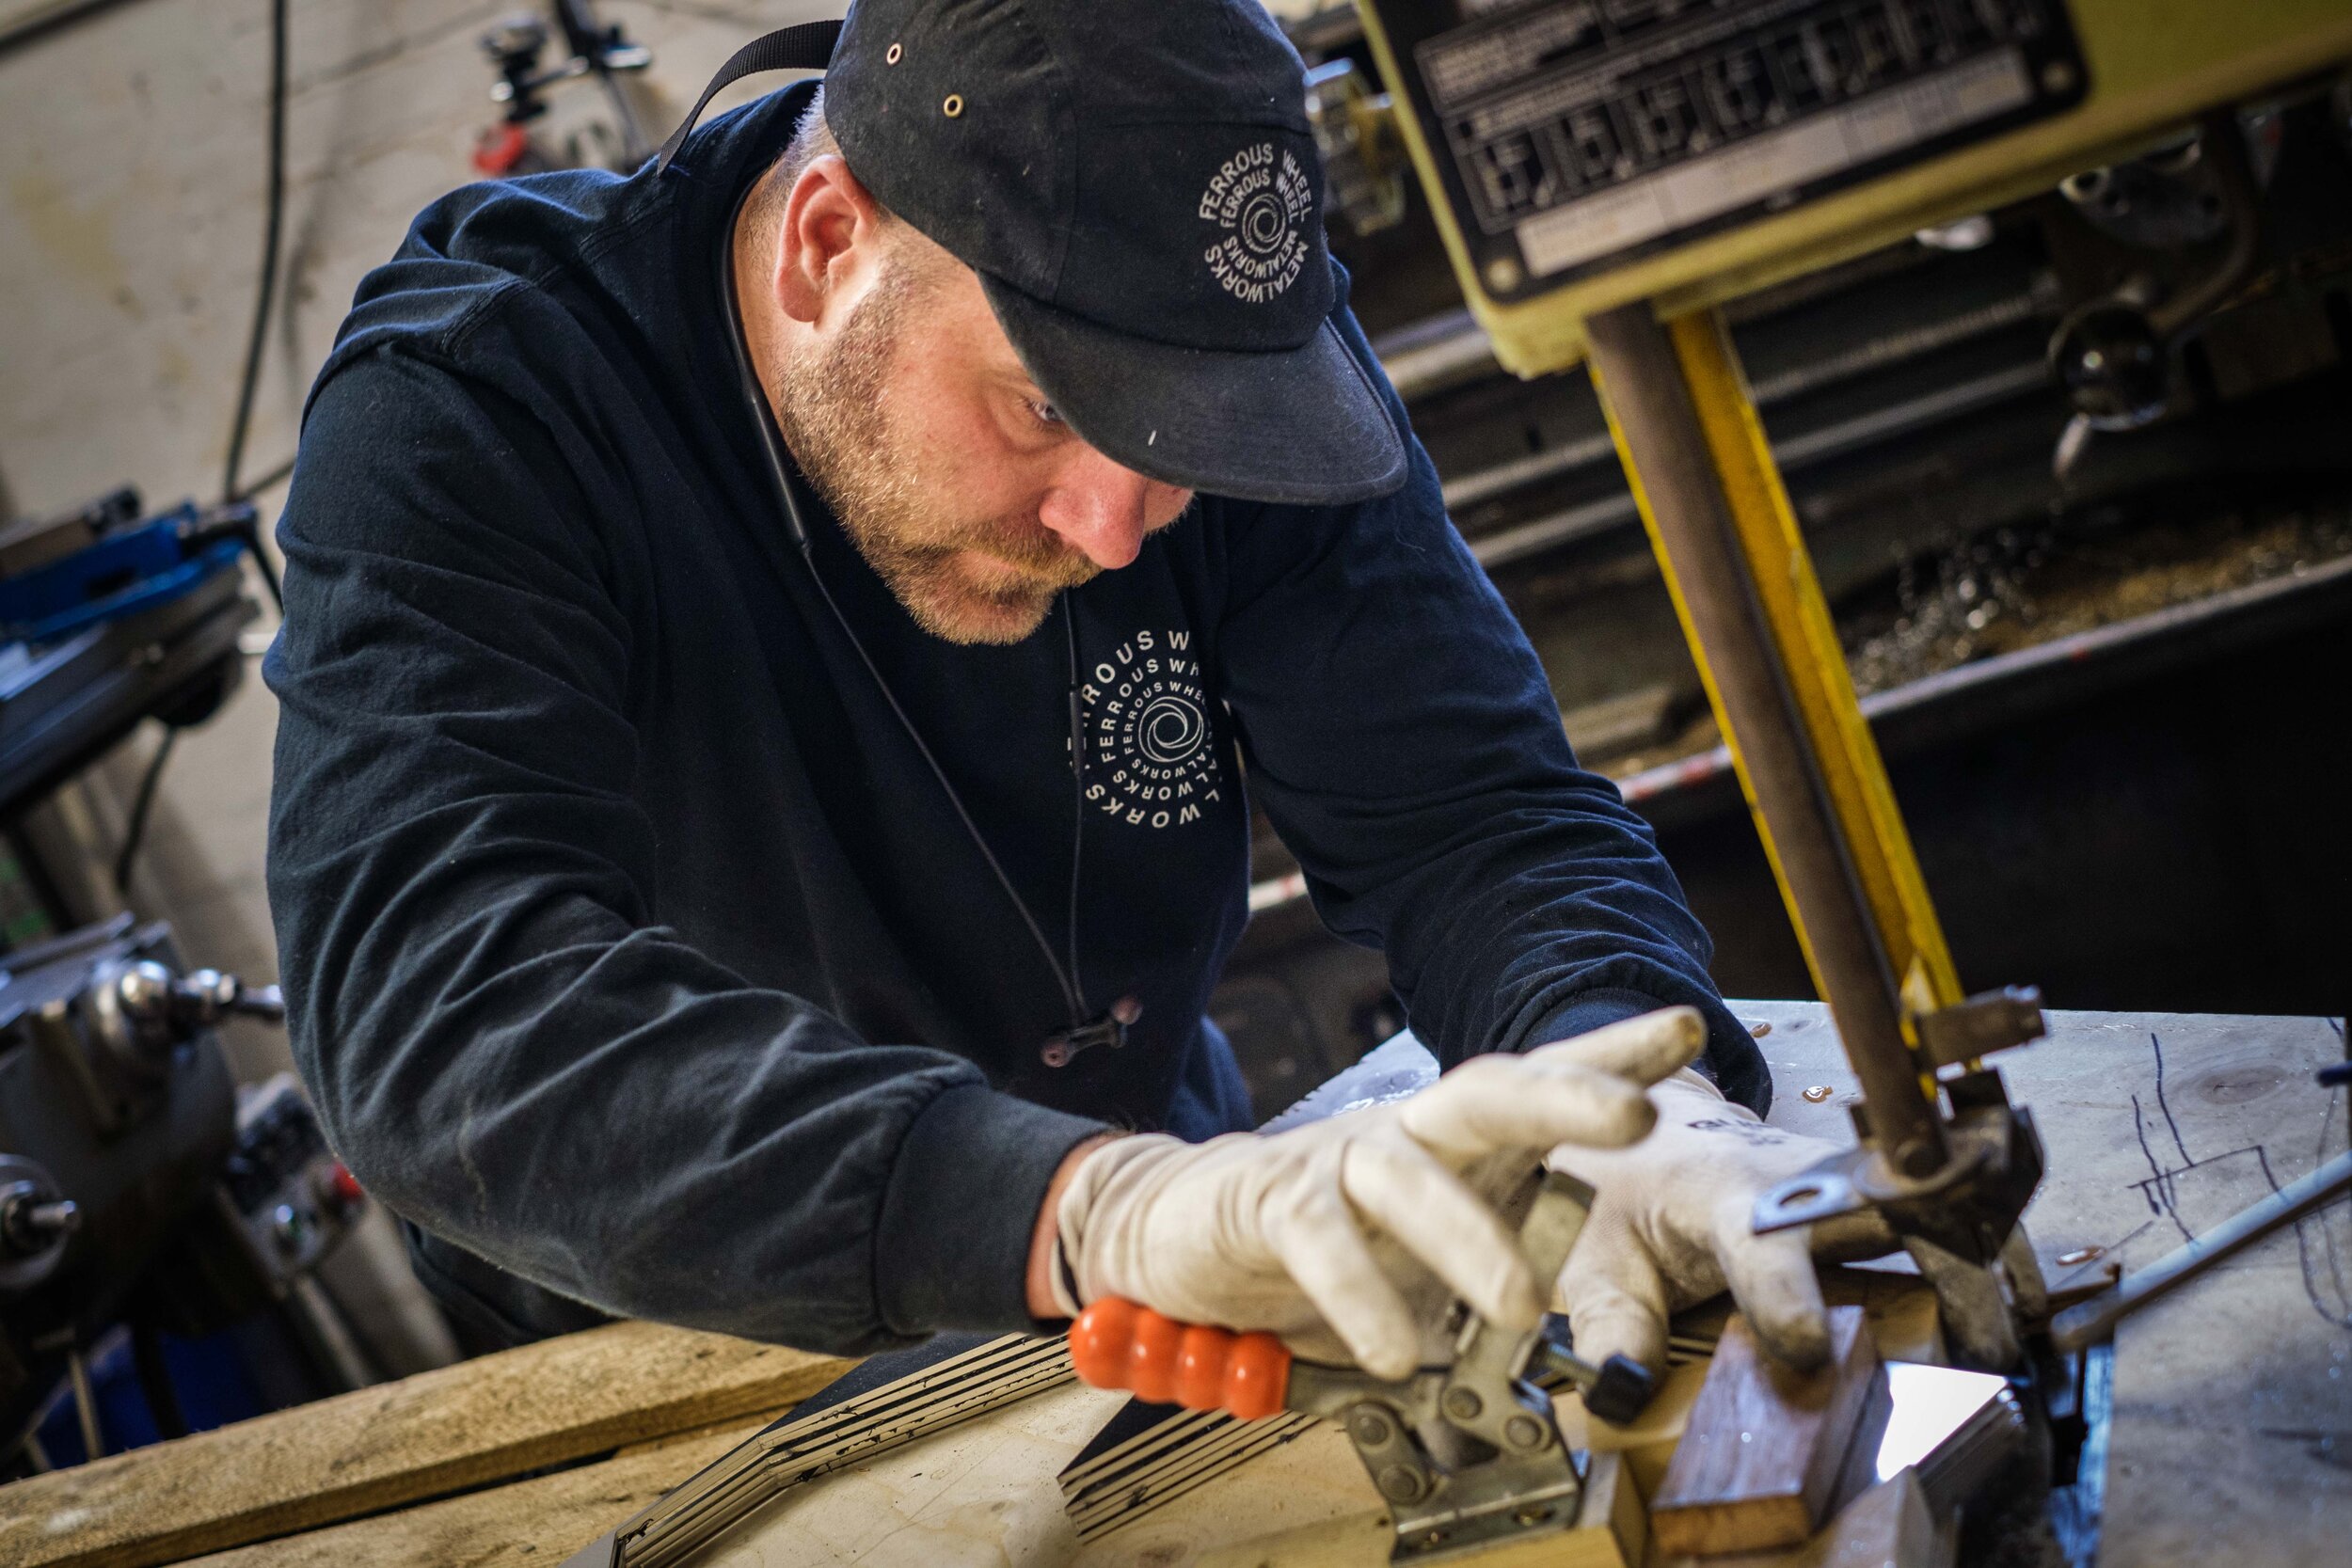
Why am I here? When I visited this space last year during the same LDF I was fascinated by the impression that this was more than a space full of workshops and creators, as interesting as that alone would be for me: it looked like there was also a sense of community among the craftsmen.
I asked for the chance to document this space and the people working there: OOOS (Instagram handle @ooospaces) was quick to allow me to have access (thanks Hattie, Stu and Simon!). Since then I have been coming almost every week (around lockdowns of course) and found the creators and the whole community very welcoming and happy to let me be a fly on the wall while they were working their magic.
After many, many hours spent in the space and many thousands of images the project is finally starting to coalesce. I was kindly offered some space to show my work for this occasion and I gladly accepted, taking the opportunity to delve a bit deeper in my archive of images and start making a more definitive selection for the future articles featuring each workshop. This also allowed me to select the candidate images for the exhibition.
So, at that point it was a doddle, wasn’t it? Nope. Not at all!
It’s harder than it looks
Did anything go wrong? Not much, but there were a lot of considerations that I never imagined I had to make when just thinking of having an exhibition.
Timeline
I was invited to do the exhibition almost 7 weeks before the event date. Plenty of time? Well, a bit tight really. Still, I thought it was enough time. But the person I was liaising with for the organisation of the exhibit was away for 4 of those weeks with very limited internet access. So, after getting the first details right, off she goes and I think: right, let’s choose the images and…oh, wait! How much wall space will I have? Doh! Actually, will there be any wall space at all? There usually isn’t any available in the whole warehouse that would accommodate more than one image. So, how will it be displayed? That should have been my first question!! Which brings me back to the timeline: now I have to wait for her to come back from holiday to have any reasonable specifics about the display area. Her return was planned to be less than two weeks before the event. That also coincided with me being away on holiday for 2 weeks till 4 days before setting everything up! My heart-rate started going up a notch.
I finally managed to get in contact with her just over three weeks before the event: that gave me a very rough idea of the amount of space I had. I had already decided to go with 10 images to be on the safe side - I certainly wasn’t going to have a lot of wall to cover, and with that number I could be flexible - and print and frame another two if needed.
This brings us to another issue, one of the most important ones: printing your images.
Printing
This is an issue that is also tied to the timeline: I didn’t go and print straight away as soon as I was proposed to exhibit. Why should have done that? Because I outsource the printing and I never went through the process of settling on a specific printer and fine tuning the files to that printer. This meant that I had no idea how the prints would come out for colour and exposure from a specific printer! Big mistake…
When I finally decided to go for the printing of the 10 images even before I knew what the space was we were already 3 weeks in. 4 weeks to go. 2 of which with me away on holiday, seeing family after almost 2 years thanks to the pandemic.
I had a week to print and see if the images were good enough or needed re-printing. I chose a printing lab that seemed to have really good reviews, high quality and large printing facilities and very importantly fast delivery!! They weren’t supplying an ICC colour profile for their printers, they just advised to cut the screen brightness to 50% on the computer and go from there! I colour-calibrate my screen, so I thought I’d try. I ordered three print first: one light, one medium, one dark, to see how the exposure gamut was rendered. When the prints arrived (promptly I should say, next day delivery) I was pretty happy with them so I decided to go to the next step.
Framing
I had a golden pass there: a photographer friend gave me the number of a local framer that works from home, delivers really high quality framing and has reasonable prices. Off I go with my fresh prints (the three, not all of them) to decide how to frame them. I had in mind what turns out to be what 99% of photographers have in their mind: black frame, off-white mount. Not a problem, I think there is a good reason for that, the framing just supports the image and doesn’t distract.
Easy peasy? Well, not really. What is the budget? That was the first question. What materials? What thickness and design of frame? What quality for the mount? What kind of glass?
Luckily I was ready for the budget question, and the framer really helped me there with the materials decisions. We decided quite quickly what I wanted and we agreed on price and timing. That was two days before I was leaving for the holiday. Wait, what? Didn’t I say I had only three prints? Yes, I did!
The cunning plan was for me to agree on the framing process, materials and timeline and then have the prints sent straight to the framer while I was away. I had three prints I was happy with across the exposure range, colours were great. What could go wrong?
A lot, as it turns out.
Troubleshooting
Or un-shooting yourself in the foot!
Why do I say that? Because I am an irredeemable optimist and I tend to do a lot of things last minute. Including choosing the candidate images for my exhibition!
The main reason why I had not printed everything earlier is that I had to go through the whole body of work I have already produced to choose which images to show, and as any photographer can attest to it’s not easy choosing among your shots which are really working and which are looking good just because you shot them. I had to choose from a pool of more than 800 shots I had selected as candidates for the documentary articles that I will soon start publishing here. It’s slow work and a bit daunting: procrastination won.
The other excuse I found to procrastinate was that I would have lots of free time on holiday and that would start 3 weeks before the exhibition. Plenty of time, I reasoned. Damn.
Off we go on holiday, and after the customary “rest”, feeding frenzy and Olympic level gossiping and chatting (family for you - you have to love it!), two days in I sit down with my laptop and hard drives and start selecting my candidates. That was not an issue: I had all my shots with me, my editing software, almost like back at home. The fly in the ointment is that my laptop simply refused to connect to any wifi network. None. Even my hotspot through the phone, trusted and tried before: it didn’t want to hear it. I googled, read forums, tried various convoluted solutions, no chance. Now, where my family lives there are no internet cafes or coffee chains to plonk your backside down and work on the web using their wifi. I couldn’t try that, but I’m sure that wouldn’t have worked either, because as soon as I got back home in UK and opened the laptop, ta-dah! Connected instantly! Go figure.
So I found myself with the selected images, after a hefty amount of consideration, and no way to send them to the printer! Thinking it through I tried to beam them to my phone (which was happily surfing the web without complaint) but trying to avoid any compression/modification of the images, which I finally succeeded in doing. I get to the printer’s order page, set it up, upload the files and voil…what? Upload failed. Maybe just retry. Upload in progress…1%…1%…1%…failed.
I started drawing heavily from my repertoire of swear words. No matter how many times I tried it just failed. Ok, think. It’s 6 images, a lot of data…try one? 1%…5%…30%…done! Whopee! We’re on! One at a time, I finally managed to send the to the printer.
Another issue was something that probably most non professional photographers don’t even consider: room lighting. I have calibrated my screen for colour and brightness and I always edit in the same room with lighting coming from my left from the window or the wall light. This is already not ideal, because I have two different light sources with two different intensities and colours. On holiday I had no place I could sit where there was a decent subdued lighting that had any resemblance to what I have at home. Why is that a problem? Well, although I check the white balance on all my pictures and I had already done that for all 800+ of them, colour was not the issue. Exposure was. I had no repeatable conditions for the ones I had sent to print already and of course I had not thought of that. Yes, the 50% brightness on the screen was still the same, but the room lighting wasn’t. And of course this was reflected in the final prints, which turned out a bit too dark. Damn.
The last issue was printing related again. Reminder to myself: never print the same images on different paper and printing device for the same exhibition! I chose archival high quality paper, glossy, from a large format professional printer for the framed exhibition images. I then made some postcards to be used in the same event to give them out - you can read about that below - choosing glossy paper again, but the paper and the printing device were different (same printing company). Well, exposure was roughly ok but the colour…yellow cast on all of the images. Damn. Again.
Setting up
So, I decided for 9 prints at the end: why? Because I had finally managed to communicate with the person I was liaising with and had a couple of options for the exhibiting space, both really small. I opted for 9 so I could lay them out in a square, 3 rows of 3, and get the in any of the two spaces easily.
At the end the setting up was the easiest part of the process: not because I am experienced, but because of the lack of options: not dedicated lighting available, no fancy routes or digital installations, just two plywood panels together leaning against a wall creating a 244x244cm surface to hang my prints.
The only difficulty was that I shouldn’t damage those panels too much so they could end up using them afterwards in the workshops - let’s not waste carelessly! No screwing them together to stabilise them, no painting them, just keep them as pristine as possible. Which meant that the frames had to hang across two separate panels not fixed together. Two flexible panels, that is!
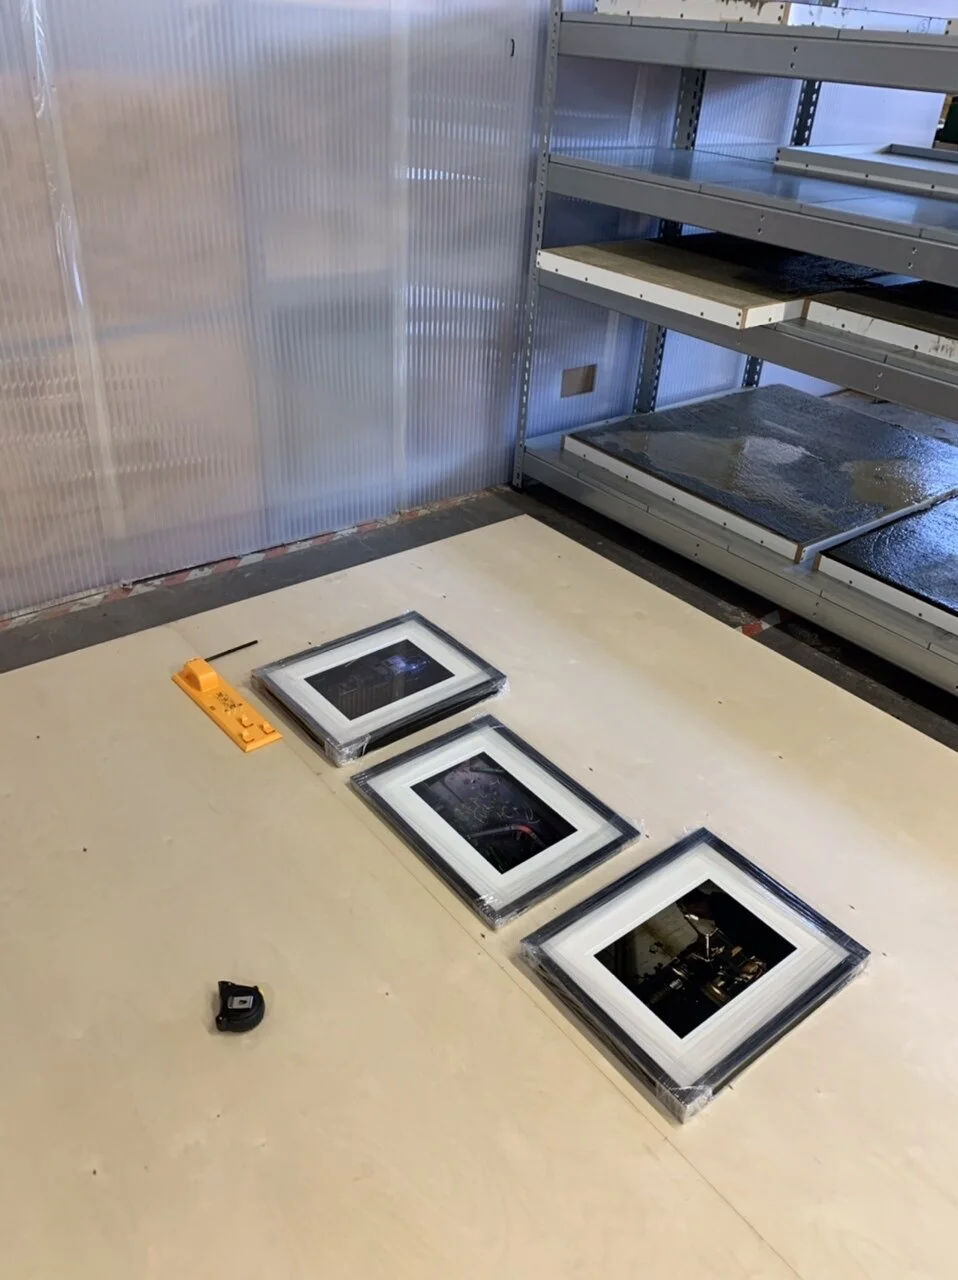
Got the panels on the floor, lined them up, shoes off and hopped on them to start measuring for the correct placement:
You can see the highly industrial look I was going for…in that my space was next to steel shelves holding cast concrete bar surfaces in the process of drying. They take 4 weeks to fully dry, and they had to be irrigated with water every day. When you talk about a live exhibition: live working people around my frames! Not high fashion but I think it definitely fits my project. And I didn’t have to concoct it like a real artist would!
The yellow thing in the picture is a tool to help hanging the frames level and exactly in the right place: extremely useful!
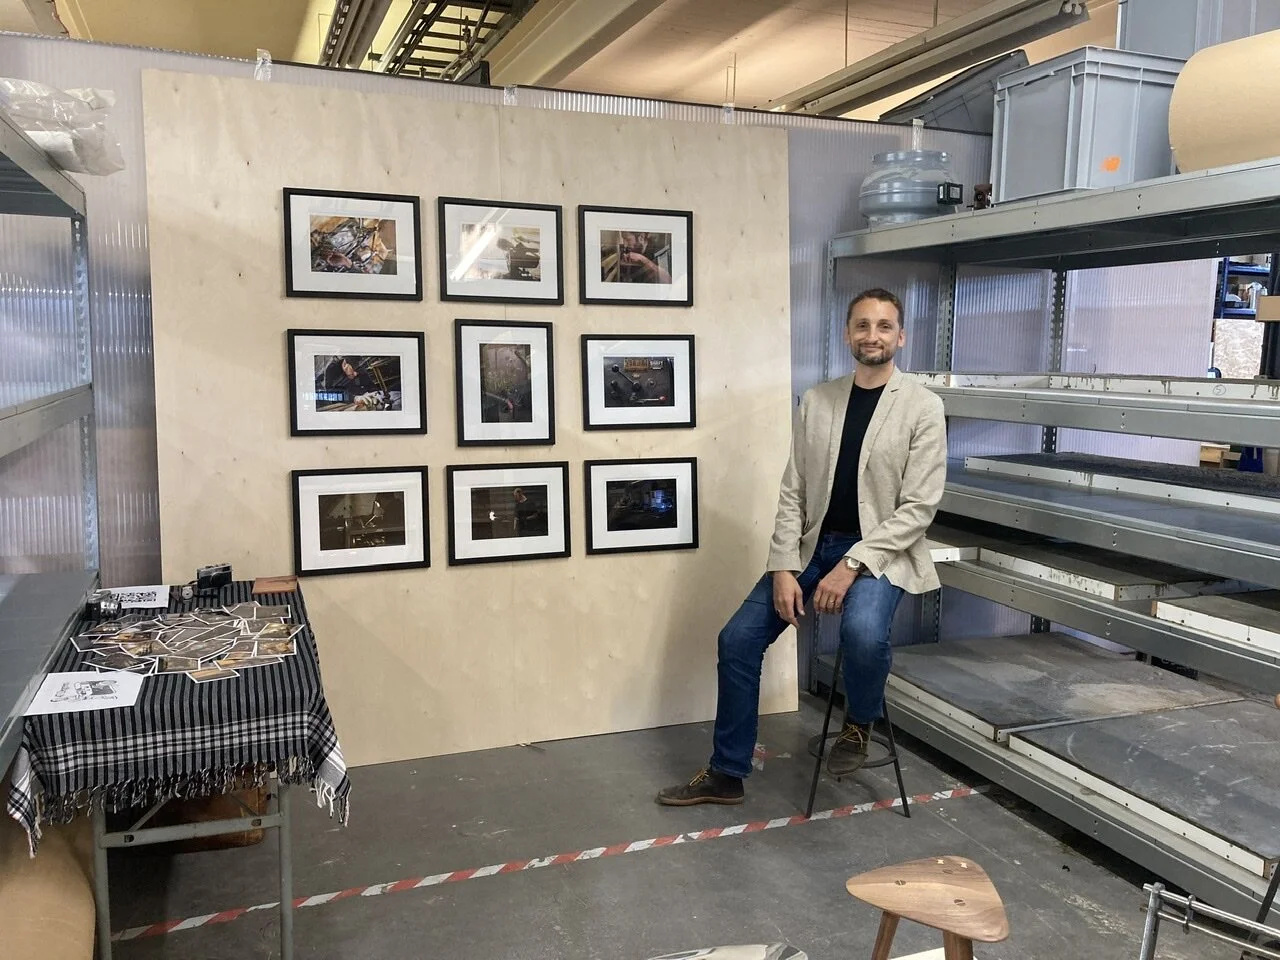
At the end the panels went up easily, I aligned them and hanged the frames as I wanted them. The result is in the first image at the top: does it work? Ideally I would have liked to put those images in a single line to have all of them at the same height, so the viewer doesn’t have to stoop. They’re not made for sticking your nose against the glass, but they would work better. I gave a kind of transition to the lighting values from top left to bottom right, going from light to dark. You’re welcome to let me know what you think below!
Involving the audience
The LDF certainly wasn’t dedicated to photography, and the exhibition in itself wasn’t really well advertised. Why? Probably because I was aware of the cobbled-together-ness (is that a word? I just made it up!) of the whole set-up. But mainly because I have kept my project under cover for now, not wanting to give away part of it only to find the any possible interest has already fizzled away by the time I am ready: with the average attention span of today’s audience chances are that a lot of people will skip by thinking they have already seen it. Am I totally wrong? Anyway, I will start sharing the first article very soon and start putting the project out, stay tuned! I was really happy to run the exhibition as a learning process and to add some interest to the OOOS visit experience. But how to do so?
I made a little stand on the side of the display, as you can see on the image at the top, and printed a series of postcard-sized images for the visitors to browse through and take home (it was a selection of 20 images, to give a further glimpse on the project). On the back of the postcards I had affixed my details, like a business card, and prompted the visitors to pick one up for themselves. I also had a large QR code for them to scan to access my website, my logo, and my Street Photography portfolio booklet for them to leaf through:

Stu, Hattie and Liam from OOOS were fantastic because they introduced me and my work while giving the tour of the space. The postcards seemed to really spark curiosity, and many people browsed and almost everyone took one (or more…I’ll talk about that another time) with them. The yellow cast was never noticed by any visitor…
I met some really interesting people and some even gave some useful information on where to find other opportunities to run a similar project. I really enjoyed the personal interactions, I love learning about other people’s opinions and life stories!
It was quite interesting to see how people interacted with the exhibition. And the postcard selection allowed me to see what people liked and stopped to look at.
How much did it cost?
Very few people think of this side of an exhibition. We all dream of having a big gallery doing the heavy lifting for us, they will be printing, framing, setting up, lighting, marketing, taking care of all the things a true artist should never know even exist, while we can bask in the glory during the opening and enjoy the revenue from the sold prints.
Wake up. As I said, very few of us have any exhibition material at all. Of those few, a very small percentage have marketable material for the art world, anything that a gallery can sell for a profit after going through the hefty expense of setting up an exhibition and keeping it there for a period.
This means that the rest of us, if we want to exhibit, will have to do it at our own expense. So, how much did it cost me?
Printing and framing is where the main cost is usually, together with the space rental and set up. Thanks to the awesome guys at OOOS the space and panels were kindly offered, so I only had the images to think about.
Overall I spent £90 for the images to be printed, £270 for the framing (a fantastic price I have to say), £20 for the postcards (100 of them), £10 for the hanging device, and some change.
Overall I’m out of pocket by roughly £400 but I learned a whole lot in the process. Was it worth it? Absolutely! At the end I learned loads for a reasonable outlay: I was lucky. It could have been a lot more expensive. I will remember all of this for a long time, and I will reflect on the main points I learned through my first photography exhibition in a dedicated article.
The images
Thanks for reading if you got so far! If you’re wondering where the hell the images I exhibited are, here they are!
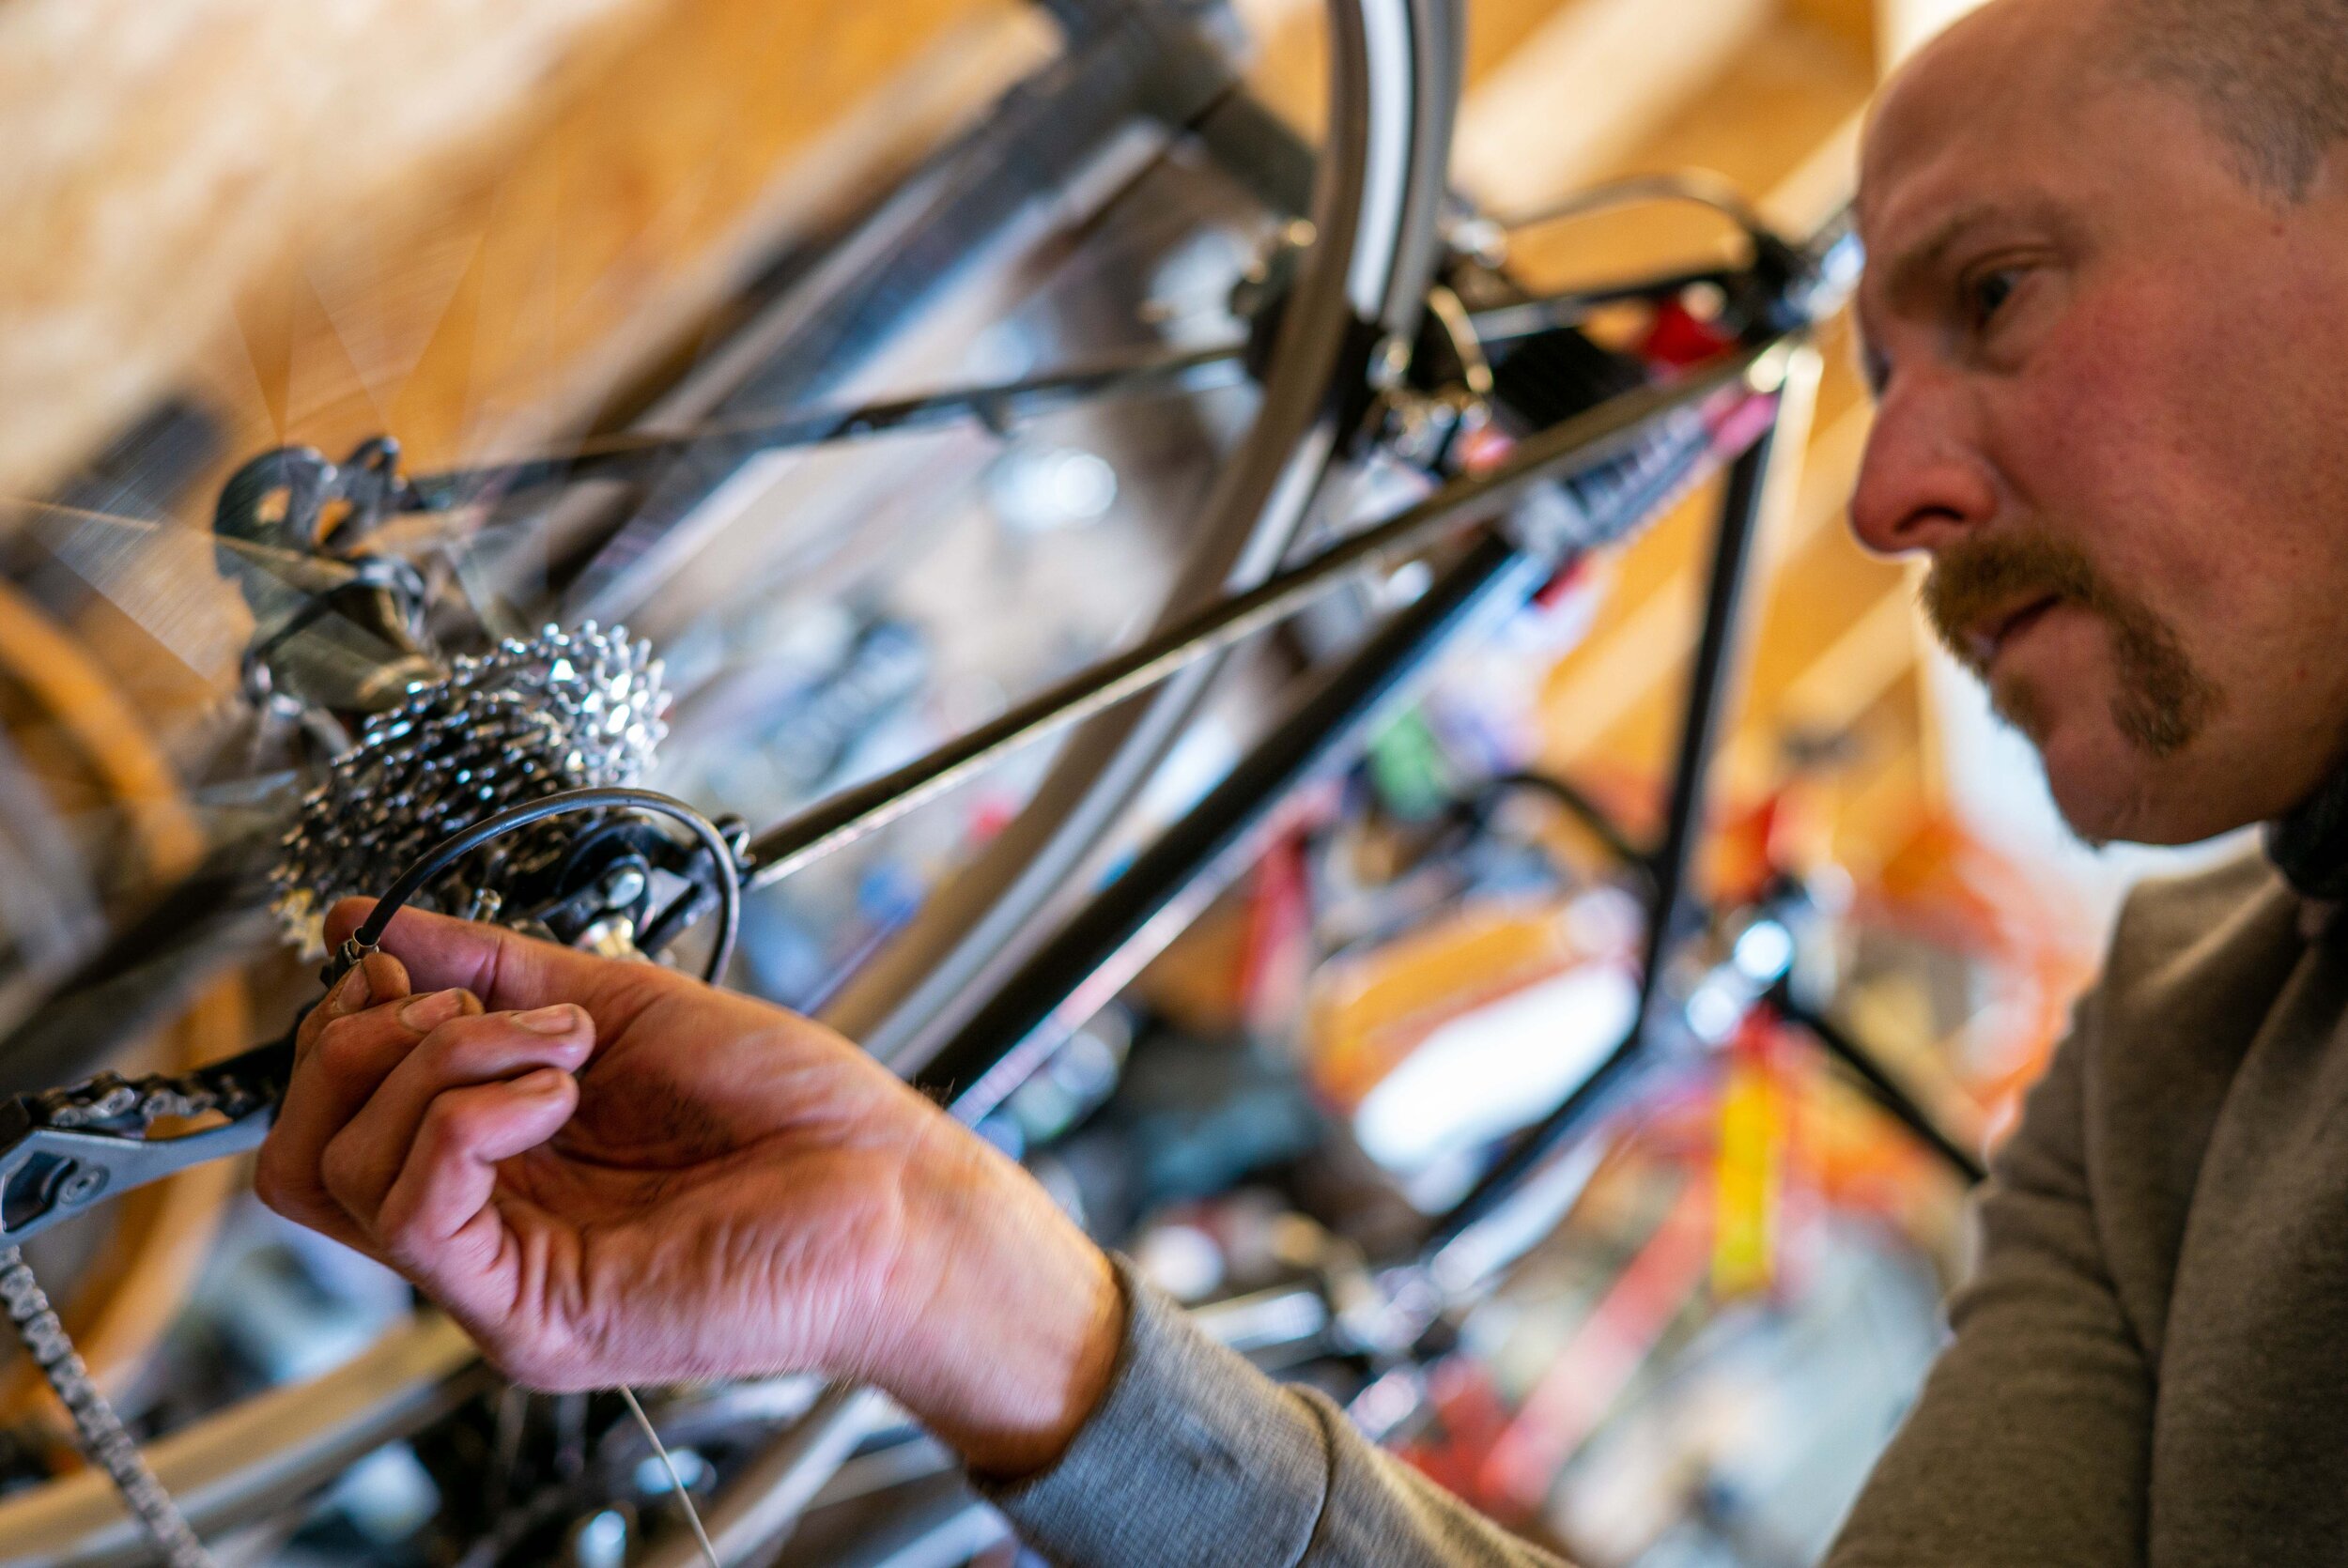
Please leave your comments below, let me know your thoughts.